
Welcome & Configuration
The Welcome & Configuration page is the initial interface you see when starting Sharp Stock. When no asset library is loaded, the application will display this page to guide you in establishing or connecting to a resource repository. Once a library is successfully loaded, the system will automatically switch to the Main Management Interface.

1. Basic Preference Settings
In the top-right corner, you can quickly adjust basic runtime preferences, which will be saved automatically:

- Interface Language: Supports Simplified Chinese / Traditional Chinese / English / Spanish.
- Theme Scheme: Supports 🌓 Follow System, 🌙 Dark Mode, and ☀️ Light Mode.
TIP
After successfully loading a library, you can still modify these options at any time via Left Sidebar ⚙ Settings → Interface Preferences. See the Settings Guide for more info.
2. Core Initialization Operations
The central welcome card provides two main ways to start your workflow:
2.1 Open Local Library
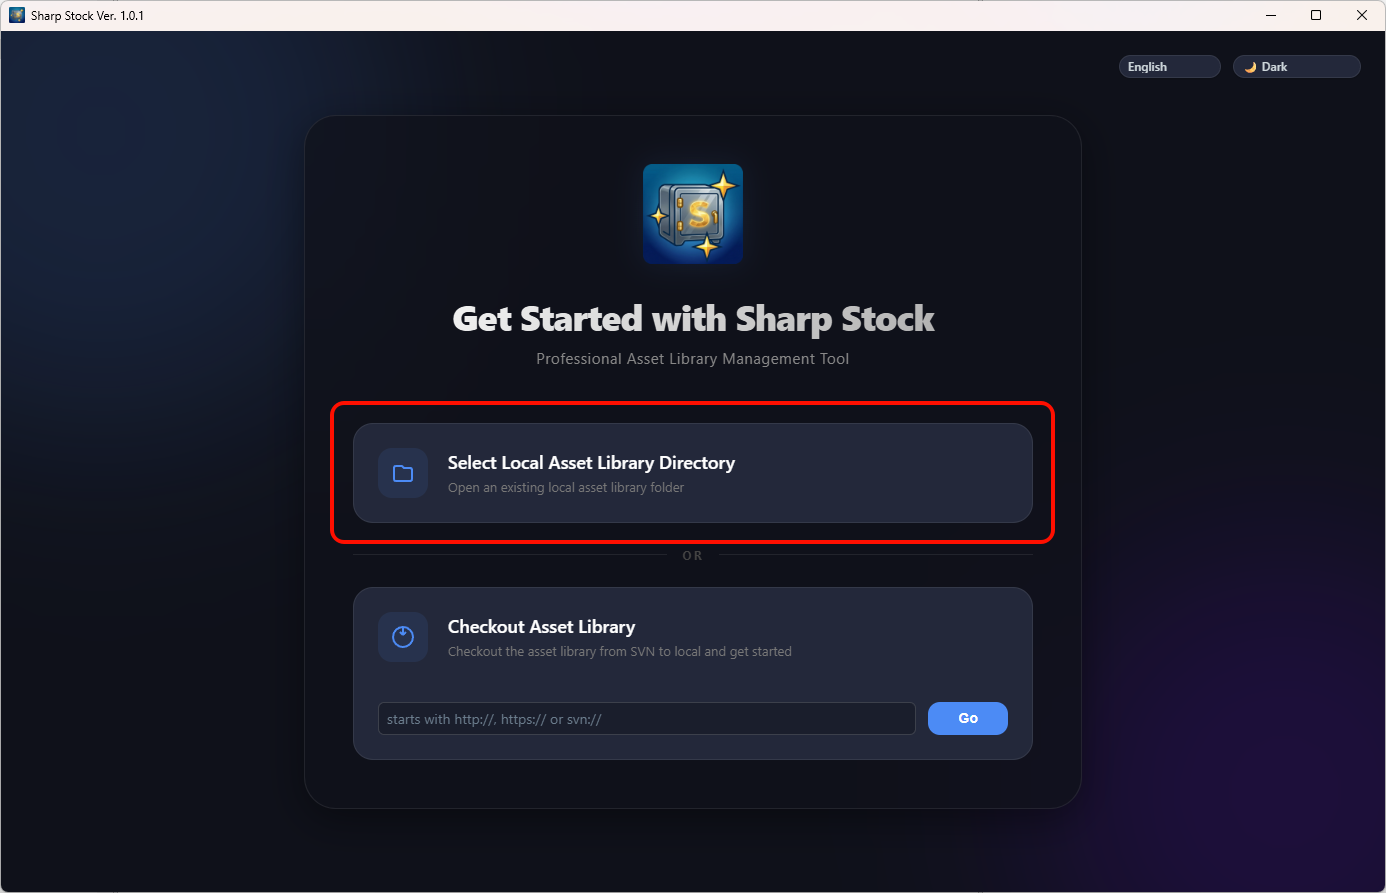
Click the "Create or Open Sharp Stock Library" button to open an existing Sharp Stock library or initialize a new one in an empty folder.
NOTE
A Sharp Stock library directory is not a generic folder—it is a managed directory with a dedicated database (such as assetlib.db) and a standard folder structure.
Use Cases:
- You already have a Sharp Stock library on your computer and want to open and manage it.
- You plan to create a brand new Sharp Stock library in an empty directory.
For specific steps and initialization logic, please refer to Quick Start: Configuring Your Library.
2.2 Checkout Sharp Stock Library from SVN
If your team hosts a Sharp Stock asset library on SVN (not a generic SVN repository), enter the repository URL on the welcome page and check out to an empty local folder:
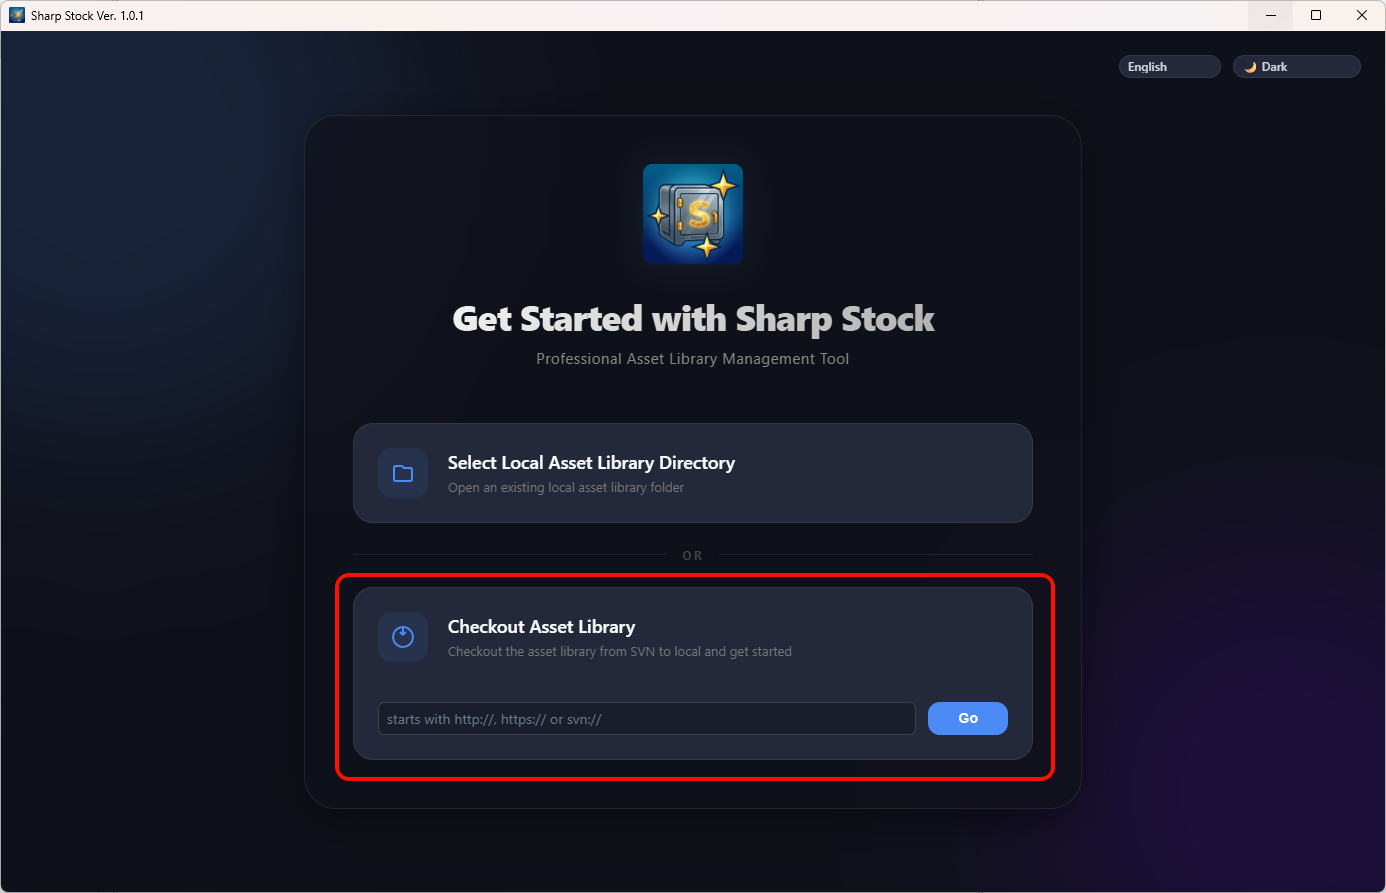
- Input Address: Enter the full remote repository address in the input box (must start with
http://,https://, orsvn://). - Execute Checkout: Click the "Go" button or press the Enter key.
- Progress Feedback: The system will indicate the current stage via animation and bottom overlay (Verify Address → Select Storage Path → Sync Checkout → Open Library).
- Authentication: If the server has access permissions, the system will automatically pop up a dialog for your Username and Password.
For detailed procedures and environmental requirements, please refer to Quick Start: Configuring Your Library.
NOTE
Only Sharp Stock library SVN repositories are supported (must include assetlib.db, assets/, and the standard structure). The checkout destination must be an empty local folder.
IMPORTANT
Environment Note: The Windows version includes built-in core components; no external SVN client is needed. macOS users must pre-install SVN command-line tools. See Installation & Launch for details.
3. Interface Transition
Once a library is successfully loaded or created, the start page will automatically hide, and the full functional interface will open:
- Left Sidebar: Directory structure, team collaboration entry, and settings.
- Main View Area: Search filtering, asset preview grid, and status statistics.
- Right Detail Panel: Interactive preview, property editing, and image tools.
To change the asset library, you can perform Switch or Close actions via ⚙ Settings → Library Status. Closing will return you to this initial page.